Smoked Turkey Tails: The Ultimate Guide to Flavor, Cooking, and Nutrition

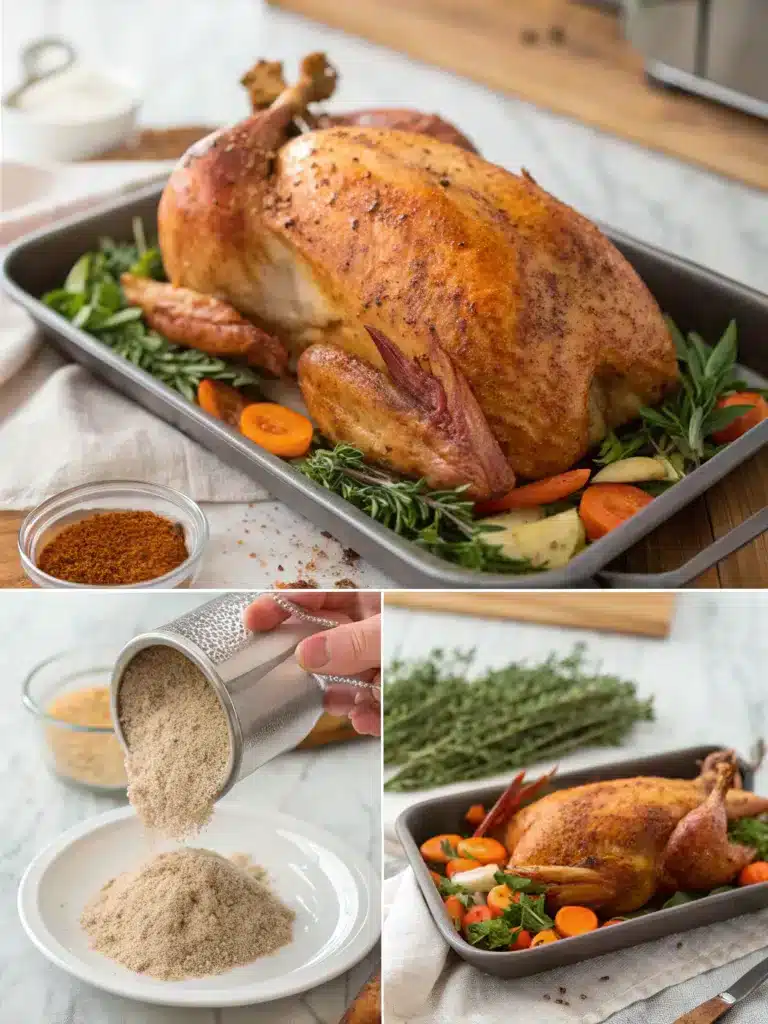
Smoked turkey tails in cast iron pan fresh from oven

Smoked turkey tails are an often-overlooked cut that packs a serious punch of flavor, tradition, and culinary versatility. Commonly found in soul food and Southern-style cooking, turkey tails have become a go-to choice for home chefs looking to create rich, smoky, and satisfying meals on a budget. In this guide, we’ll explore everything from what smoked turkey tails are, to how to cook them, serve them, and even how they fit into a healthy diet. Whether you’re a fan of comfort food or just curious about this flavorful meat, we’ve got you covered.

Check out our bold twist with Smoked Cream Cheese if you’re into unforgettable smoky bites.

Print
clock clock iconcutlery cutlery iconflag flag iconfolder folder iconinstagram instagram iconpinterest pinterest iconfacebook facebook iconprint print iconsquares squares iconheart heart iconheart solid heart solid icon
Smoked turkey tails in cast iron pan fresh from oven

Smoked Turkey Tails: The Ultimate Guide to Flavor, Cooking, and Nutrition


  • Author: MALAK
  • Total Time: 1 hour 40 minutes
  • Yield: 4 servings 1x

Description

Smoked turkey tails are a flavorful and traditional Southern favorite, known for their rich, smoky taste and versatility in comfort dishes like greens, beans, and rice.


Ingredients

Scale
  • 23 smoked turkey tails
  • 1 onion, chopped
  • 3 garlic cloves, minced
  • 1 tsp black pepper
  • Optional: chili flakes, apple cider vinegar

Instructions

  1. Rinse turkey tails and place in a large pot.
  2. Add enough water to cover the tails.
  3. Add onion, garlic, and seasonings.
  4. Bring to a boil, then reduce to a simmer for 1–1.5 hours.
  5. Serve alone, over rice, or use the broth for greens.

Notes

For crispy skin, bake at 375°F for 45–60 minutes or smoke raw tails at 250°F for 2.5–3 hours. Always rinse smoked tails before cooking to control saltiness.

  • Prep Time: 10 minutes
  • Cook Time: 90 minutes
  • Category: Main Dish
  • Method: Boiling or Baking
  • Cuisine: Southern

Nutrition

  • Serving Size: 1 tail
  • Calories: 325
  • Sugar: 0g
  • Sodium: 900mg
  • Fat: 28g
  • Saturated Fat: 9g
  • Unsaturated Fat: 17g
  • Trans Fat: 0g
  • Carbohydrates: 0g
  • Fiber: 0g
  • Protein: 13g
  • Cholesterol: 85mg

Keywords: smoked turkey tails, soul food, southern cooking, turkey tails, comfort food

PART 1: What Are Smoked Turkey Tails?

Understanding the Cut: What Part of the Turkey is the Tail?

The turkey tail is exactly what it sounds like—the fleshy, fatty appendage at the base of the turkey’s back where feathers were once attached. It contains a small portion of meat surrounded by a rich layer of fat, which gives it a unique texture and taste when cooked. Despite being a lesser-known cut, it’s treasured in various cultures for its deep flavor and affordable price.

Smoked turkey tails are pre-cooked using a smoking process that infuses them with a deep, savory flavor. They’re typically sold fully smoked, making them easy to use in a variety of dishes with minimal prep.

Why Smoked Turkey Tails Are a Southern Delicacy

In the South, smoked turkey tails are more than just a meal—they’re part of a culinary legacy. Traditionally, they were used to flavor pots of beans, greens, or cabbage, much like ham hocks or smoked neck bones. Over time, cooks realized these tails weren’t just good for seasoning—they were delicious in their own right.

Whether slow-cooked, stewed, or roasted, turkey tails lend a smoky backbone to any dish. Their naturally high fat content melts down during cooking, enhancing whatever it touches with savory goodness. You’ll often find them featured at BBQ joints, family reunions, and holiday gatherings across the South.

Nutritional Value of Smoked Turkey Tails: Fat, Protein & Flavor

Smoked turkey tails offer a mix of indulgence and nutrition:

NutrientAmount per 100g
Calories275–350 kcal
Protein12–15g
Total Fat25–30g
Saturated Fat9g
Sodium (if smoked)800–1,000mg

They’re high in fat, which is what gives them their buttery mouthfeel. While not the leanest cut, turkey tails are still a great source of protein. Moderation is key, especially if you’re watching fat or sodium intake.

Still, when balanced with vegetables or fiber-rich sides, they can be part of a satisfying and flavorful meal. Their richness means a little goes a long way.

PART 2: Why Smoked Turkey Tails Are Good to Eat

Southern-style plate with smoked turkey tails and greens
A soul food classic: turkey tails, greens, and cornbread

Rich Flavor and Texture: A Hidden Gem in Soul Food

Smoked turkey tails bring bold, deep flavor with every bite. Thanks to their high fat content and smoking process, they carry a natural richness that transforms even the simplest meals into something memorable. The fat melts beautifully into soups, stews, or pots of greens, infusing dishes with savory notes without needing extra seasoning.

Unlike lean cuts of turkey, the tail is tender and juicy. Its texture falls somewhere between pork belly and turkey thigh—crisp on the outside when roasted, moist and buttery on the inside when simmered. It’s no wonder smoked turkey tails are considered a soul food staple.

In fact, for generations, cooks have prized turkey tails as a way to stretch meals. One tail can flavor an entire pot of beans or greens, offering a cost-effective yet indulgent way to cook.

Discover great ideas like Smoked Mac and Cheese to serve as a perfect creamy complement to smoky meats.

Comparing Smoked Turkey Tails to Other Smoked Meats

When it comes to flavor, smoked turkey tails stand strong against other smoked cuts like ham hocks, turkey wings, or smoked neck bones.

Here’s how they stack up:

Smoked CutFlavor ProfileFat ContentBest Use
Turkey TailsRich, buttery, smokyHighStews, greens, rice dishes
Ham HocksSalty, porky, robustMedium-HighCollard greens, beans
Smoked Turkey WingsMeaty, less fattyMediumRoasts, soups, standalone dishes
Smoked Neck BonesDeep, earthy flavorLow-MediumBroths, beans, stock

Turkey tails offer more richness than smoked wings and more moisture than neck bones, making them the top pick for dishes that need both flavor and fat.

Plus, they’re often more affordable and accessible, especially in areas with Southern or island influences. In Hawaiian, Samoan, and Filipino communities, for example, turkey tails are highly appreciated and creatively prepared.

Don’t miss our Stuffed Pepper Casserole for a hearty pairing that balances the savory richness of turkey tails.

PART 3: How to Buy and Store Smoked Turkey Tails

Where to Buy Quality Smoked Turkey Tails (Online & Local)

Smoked turkey tails aren’t typically found in standard grocery store aisles, but they’re far from rare. You’ll have better luck finding them in:

  • Southern grocery chains like Piggly Wiggly, Winn-Dixie, or Food Lion
  • Ethnic markets, especially Caribbean, Filipino, or Polynesian stores
  • Butcher shops or meat counters in rural areas
  • Online meat suppliers like Crowd Cow, Wild Fork, or local smokehouses

When buying, look for smoked tails that are fully cooked and vacuum-sealed. These are easier to work with and store, and they typically last longer. You may also find fresh, unsmoked turkey tails, which give you the flexibility to season and smoke them yourself.

If you’re new to them, opt for a smaller pack to test out flavor and texture. Some brands pre-season their smoked tails, while others keep it plain. Either can work well depending on your recipe goals.

Looking for inspiration? Try the Avocado Spread Guide for a bright and creamy contrast to smoky meat.

Best Practices for Storing Fresh and Pre-Smoked Turkey Tails

Storage is crucial to maintaining the quality of smoked turkey tails. Here’s a breakdown:

Type of Turkey TailStorage MethodShelf Life
Fresh (raw)Refrigerated (32°F)2–3 days
Fresh (frozen)Freezer (-0°F)Up to 6 months
Smoked (vacuum-sealed)Refrigerated1–2 weeks (unopened)
Smoked (opened)Airtight container3–4 days in the fridge
Smoked (frozen)FreezerUp to 3 months

Pro Tip: Always label your frozen items with the date so you know when it’s time to use or toss. And if you’re storing cooked leftovers, make sure they’re fully cooled before refrigerating to prevent bacterial growth.

To reheat smoked turkey tails, avoid the microwave. Instead, warm them gently on the stove or in the oven with a bit of broth to keep them from drying out.

PART 5: Best Ways to Cook Smoked Turkey Tails

Boiling smoked turkey tails with seasoning and broth
moked turkey tails slow-simmering to perfection

Classic Southern Boiled Turkey Tails Recipe

One of the simplest and most traditional ways to prepare smoked turkey tails is by boiling them. This method is perfect for infusing flavor into vegetables like collard greens or cabbage.

Ingredients:

  • 2–3 smoked turkey tails
  • 1 onion, chopped
  • 3 garlic cloves, minced
  • 1 tsp black pepper
  • Optional: chili flakes, apple cider vinegar

Instructions:

  1. Rinse turkey tails and place in a large pot.
  2. Add enough water to cover the tails.
  3. Add onion, garlic, and seasonings.
  4. Bring to a boil, then reduce to a simmer for 1–1.5 hours.
  5. Serve alone or over rice, or use the flavorful broth as a base for greens.

This method breaks down the fat and collagen, creating a luxurious broth that tastes like it simmered all day.

Smoked Turkey Tails in an Oven or Smoker

Want crispy edges and deep, smoky aroma? Baking or smoking is your go-to. Here’s how to elevate the texture while maintaining that bold flavor.

Oven Method:

  1. Preheat oven to 375°F.
  2. Place smoked turkey tails on a baking tray with parchment.
  3. Season with paprika, garlic powder, and a touch of brown sugar.
  4. Bake for 45–60 minutes, turning halfway for even crisping.

Smoker Method (for raw turkey tails):

  1. Season raw tails with a dry rub.
  2. Smoke at 250°F for 2.5–3 hours, until internal temp hits 165°F.
  3. Rest before serving or slicing.

This is perfect for BBQ platters, or paired with classics like mac and cheese.
Don’t miss our Stuffed Pepper Casserole—a baked dish that pairs beautifully with crisped turkey tails.

One-Pot Smoked Turkey Tails and Beans Combo

For a hearty meal, nothing beats one-pot smoked turkey tails with beans or peas. The smoky fat seeps into the legumes, transforming the pot into something soulful.

Try this combo:

  • Smoked turkey tails
  • Red beans or black-eyed peas
  • Onion, celery, bell pepper
  • Bay leaves, thyme, and Creole seasoning

Let simmer until the beans are tender and the meat falls off the bone—about 2 hours. Serve over steamed white rice for a full meal.

This dish is popular throughout the South and even has roots in Pacific cuisines where turkey tails are revered.

PART 6: Serving Ideas and Recipe Pairings

Southern dinner with smoked turkey tails and sides
Complete Southern meal starring smoked turkey tails

What to Serve with Smoked Turkey Tails (Sides that Shine)

Smoked turkey tails are rich, fatty, and full of flavor—so they pair best with sides that cut through the richness or soak up the savory juices. Whether you’re planning a weeknight dinner or a Southern-style feast, these sides complete the meal:

  • Collard greens (especially cooked in turkey tail broth)
  • Cabbage (braised or sautéed)
  • Steamed or buttered rice
  • Cornbread (a Southern must-have)
  • Mashed sweet potatoes
  • Baked beans or black-eyed peas
  • Roasted Brussels sprouts for a veggie-forward contrast

Mix and match based on your mood, but be sure to balance the plate—something crisp or acidic (like pickled onions or vinegar slaw) cuts the fat and elevates each bite.

Soul Food Plates: Turkey Tails, Greens, and Cornbread

Want the full soul food experience? Here’s the classic trio that brings comfort and tradition to your table:

MainSide 1Side 2Notes
Smoked Turkey TailsBraised Collard GreensCornbreadServe with hot sauce or vinegar for balance

This combo not only tastes incredible—it’s deeply satisfying and ties into African-American culinary heritage. Cook your turkey tails with onion and garlic, simmer your greens in the leftover broth, and serve it all with a thick slice of buttery cornbread to soak up every drop.

You’ll find this meal on tables from Mississippi to Missouri—and now in modern kitchens across the country.

Turkey Tails in Rice, Stew, and Gravy

Turkey tails work magic in one-dish meals like rice casseroles and stews. Their smoked fat renders into the grains, adding richness without needing cream or extra oil.

Try these variations:

  • Dirty rice with smoked turkey tail bits
  • Red beans and rice with tails simmered in the pot
  • Brown gravy with turkey tails over mashed potatoes
  • Gumbo-style stew with tail meat and okra

The options are endless, and every one of them makes use of the turkey tail’s unmatched flavor.

PART 7: Are Smoked Turkey Tails Healthy?

Breaking Down the Nutritional Profile: Calories, Sodium & Fat

Smoked turkey tails can be incredibly flavorful—but are they healthy? The answer: yes, in moderation.

Here’s a general breakdown per 3.5 oz (100g) serving of smoked turkey tail:

NutrientApprox. Value
Calories275–350 kcal
Protein12–15g
Total Fat25–30g
Saturated Fat8–10g
Sodium800–1,000mg
Cholesterol80–90mg

Smoked turkey tails are high in fat and sodium, especially if they’re store-bought and pre-smoked. Much of the fat is saturated, which adds to their creamy mouthfeel—but can also impact heart health if consumed frequently or in large portions.

The sodium levels can be particularly high because of the curing and smoking process. If you’re watching your salt intake, consider boiling the tails briefly and discarding the first broth to reduce the salt content.

Healthier Ways to Enjoy Smoked Turkey Tails Without Guilt

Enjoying smoked turkey tails as part of a balanced diet is entirely possible with a few mindful strategies:

  • Trim visible fat before cooking.
  • Boil and drain them before adding to your main dish to lower sodium.
  • Pair with high-fiber sides like collard greens or beans to slow digestion and balance blood sugar.
  • Skip added salt and use vinegar, lemon juice, or herbs for brightness.
  • Control portions—one small tail or a few bites can flavor a full plate.

You don’t have to sacrifice flavor to eat smarter.

Portion Control & Balanced Meals

Because turkey tails are so rich, you really don’t need much. Use them like a flavor enhancer rather than the centerpiece. A single turkey tail in a big pot of greens or beans is often enough to satisfy while cutting back on saturated fat intake.

If you’re following a lower-fat or heart-healthy diet, smoked turkey necks or skinless smoked turkey wings may be a better lean protein option. But if you’re craving indulgence, just be smart about balance.

PART 8: Common Mistakes When Cooking Turkey Tails

Overcooking or Undercooking: How to Avoid

Smoked turkey tails are forgiving, but they still require attention. One of the most common issues? Cooking them too fast or too long.

Here’s how to avoid it:

  • Undercooking leads to rubbery fat and tough meat. Tails should be simmered or slow-cooked to allow the fat to render properly.
  • Overcooking, especially in the oven or on the stovetop without enough liquid, can dry out the meat and leave the skin overly crispy or burnt.

Best Practice: Cook them low and slow—whether in a soup pot, oven, or smoker. If they’re fully smoked, treat them like a braised meat: reheat gently and let the fat do the work.

Tip: Use a fork test—the meat should pull away easily. If you’re slicing with effort, keep cooking.

Not Pre-Soaking or Cleaning Properly

Smoked or not, turkey tails need a rinse before cooking—especially if you buy them packaged in brine or cured.

Mistake: Cooking them straight from the pack without a quick soak can leave your dish too salty.

Fix:

  • Rinse under cold water for 1–2 minutes.
  • If salt-sensitive, soak them in cold water for 30 minutes, then drain before cooking.

This helps mellow out any excess smoke or sodium flavor and gives you more control over seasoning.

Wrong Spices or Seasonings for Flavor Balance

Another common misstep? Using bold spices that compete instead of complementing the natural smoky flavor.

Avoid: Too much cumin, cinnamon, or sweet spices unless you’re blending for a specific flavor profile.

Use instead:

  • Garlic, onion, thyme
  • Bay leaves and black pepper
  • Red pepper flakes for kick
  • A splash of vinegar or lemon juice to brighten

Turkey tails are naturally flavorful, so keep seasoning simple and supportive.

Are smoked turkey tails good to eat?

Yes, smoked turkey tails are delicious and flavorful, especially for those who enjoy rich, fatty cuts. Their smoky taste and tender texture make them ideal for soul food dishes, stews, and BBQ platters. When cooked properly, they become fall-apart tender and infuse deep flavor into anything they touch—from greens to rice and beans.

How long does it take for smoked turkey tails to get done?

Even though smoked turkey tails are often pre-cooked, they still need 45 to 90 minutes of simmering or baking to reach ideal tenderness. Boiling takes around 1 to 1.5 hours. If they’re raw and you’re smoking them yourself, expect 2.5 to 3 hours at 250°F. The goal is to fully render the fat and soften the meat.

What part of the turkey is smoked turkey tail?

The turkey tail comes from the rear end of the bird, right where the feathers attach. It’s a small, fatty cut with a little meat and a lot of flavor. It’s sometimes referred to as the “bishop’s nose” and was once considered scrap, but has now earned popularity thanks to its savory taste and culinary versatility.

What do you do with the turkey tail?

Turkey tails are extremely versatile. You can:
Simmer them in beans or collard greens
Roast or bake them for crispy skin
Add them to rice dishes for richness
Smoke them low and slow for BBQ
Use the rendered fat to enhance flavor in soups or stews
They’re great as a flavor base or the star of the plate, depending on how you cook them.

Conclusion: Make Smoked Turkey Tails a Star on Your Table

Smoked turkey tails may not be the first thing people think of when planning dinner—but once you try them, they’ll earn a permanent spot in your recipe rotation. They’re savory, budget-friendly, and loaded with flavor. Whether you boil them Southern-style, bake them until crisp, or use them to enrich a pot of greens or beans, smoked turkey tails deliver big.

They’re a hidden gem rooted in tradition, loved across the South and Pacific Islands, and increasingly appreciated by modern foodies and home cooks alike. As long as you cook them low and slow, clean them properly, and serve them with balance, you’ll enjoy a meal that’s comforting, hearty, and deeply satisfying.

Check out more tasty recipes like our Smoked Cream Cheese to pair alongside your turkey tail creations.

Stay Connected with American Tasty

Follow us on Facebook for daily recipe drops, foodie polls, and helpful cooking hacks shared by our growing community of home chefs and flavor enthusiasts. From quick meals to weekend treats, there’s something fresh every day to inspire your kitchen routine.

Love collecting and organizing great eats? Save and pin your favorite dishes on Pinterest, where we curate boards packed with the best appetizers, game-day snacks, and creative air fryer ideas that are easy to make and impossible to resist.

Looking for more behind-the-scenes stories, kitchen insights, and food philosophy from our creator? Read our latest recipes and tips on Medium—get a deeper look at how simple ingredients become unforgettable meals at American Tasty.

Table of Contents

Technique #9: How to Steam Roast Vegetables: A Simple Cooking Guide

how to use water to sauté vegetables

Turning bland veggies into tasty dishes is a skill you can learn. I once found it hard to make veggies exciting. But then, I discovered steam roasting, which changed my cooking forever.

In the US, only 10% of adults eat enough veggies. So, finding tasty ways to cook them is key. Steam roasting makes veggies both healthy and delicious, helping home cooks improve their skills.

This guide will teach you how to steam roast veggies. You’ll learn roasting techniques that make ordinary veggies into amazing dishes. Whether you’re new to cooking or experienced, steam roasting can be your secret trick.

Key Takeaways

  • Steam roasting combines steaming and roasting for optimal vegetable preparation
  • Learn techniques to retain maximum nutrients while creating delicious meals
  • Discover how to achieve perfect texture and caramelization
  • Understand temperature and timing for different vegetable types
  • Improve your home cooking skills with professional-level techniques

Understanding Steam Roasting: A Superior Cooking Method

Steam roasting is a new way to cook vegetables that’s healthier. It mixes steaming’s moisture with roasting’s flavor. This makes veggies taste great and stay moist.

Cooking veggies can be tricky, but steam roasting makes it easy. It uses veggies’ own moisture to cook them perfectly. This way, they always come out caramelized and delicious.

Traditional Roasting vs. Steam Roasting

There are big differences between traditional and steam roasting:

  • Traditional roasting can make veggies dry and burnt
  • Steam roasting keeps veggies moist and prevents burning
  • Herbs and spices stay flavorful without getting scorched

Benefits of Combined Cooking Techniques

Steam roasting has many benefits for veggies:

BenefitImpact
Nutrient RetentionKeeps up to 50% more nutrients than boiling
Moisture ControlKeeps veggies from drying out
Flavor EnhancementMakes veggies taste deeper and richer without burning

Why Steam Roasting Works Better

Steam roasting creates the perfect cooking space for veggies. By first steaming and then using dry heat, you get veggies that are perfectly cooked and full of flavor. It’s easy and effective.

“Steam roasting is like giving your vegetables a first-class culinary treatment” – Professional Chef

With steam roasting, you’ll discover a new way to cook veggies. It boosts both their nutrition and taste.

Essential Equipment and Tools for Steam Roasting

Starting with steam oven cooking is easy. You likely have all you need in your kitchen. This makes creating tasty veggie steamers simple.

Steam Roasting Kitchen Tools

  • Rimmed baking sheet (15 x 21-inch recommended)
  • Aluminum foil or parchment paper
  • Olive oil (1/4 cup per vegetable batch)
  • Sharp chef’s knife
  • Kitchen towels for drying vegetables

You don’t need a special steam oven to steam roast veggies. A regular oven works great.

“The secret to great roasting is less about expensive equipment and more about technique.”

Choose a baking sheet with raised edges to catch oils. This prevents messy spills. Aluminum foil makes cleanup easy and stops veggies from sticking.

ToolPurposeRecommended Size
Baking SheetRoasting surface15 x 21 inches
Aluminum FoilEasy cleanupMatch sheet pan size
Olive OilCoating vegetables1/4 cup per batch

Great veggie steamers come from simple, quality tools and creativity in the kitchen.

How to Steam Roast Vegetables: Basic Technique

Steam roasting turns regular veggies into amazing dishes. It mixes steaming’s moisture with roasting’s caramelization. This makes veggies perfectly cooked every time.

Steam Roasting Vegetables Technique

The secret to steam roasting is a two-step cooking method. It brings out the best flavor and texture in veggies.

Preparing Your Vegetables

Getting your veggies ready is key before steaming and roasting:

  • Wash veggies well
  • Pat dry with towels
  • Cut them into the same size for even cooking
  • Toss with olive oil
  • Season with herbs and spices

Setting Up Your Roasting Pan

Setting up your pan is important for steam roasting:

  1. Choose a baking sheet with high sides
  2. Put veggies in a single layer
  3. Add ½ cup of water at the bottom
  4. Cover with aluminum foil

Temperature and Timing Guidelines

Knowing the right temperature and timing is crucial for steam roasting:

  • Preheat oven to 425°F
  • Cook covered for 15-20 minutes
  • Uncover for 10-15 minutes to caramelize

“Steam roasting allows vegetables to become tender inside while developing beautiful caramelized exteriors.”

This method makes veggies creamy, tender, and caramelized. It’s a game-changer for home cooking, turning simple ingredients into top-notch dishes.

Selecting the Best Vegetables for Steam Roasting

Preparing vegetables for steam roasting opens up a world of culinary possibilities. Not all vegetables are created equal for this cooking technique. The key is selecting produce that can transform under high heat while maintaining its nutritional integrity.

Selecting Vegetables for Steam Roasting

When choosing vegetables for your veggie side dishes, consider these essential factors:

  • Vegetable density
  • Water content
  • Natural sugar levels
  • Seasonal availability

Different vegetables respond uniquely to steam roasting. Root vegetables and cruciferous options tend to shine brightest in this cooking method.

Seasonal CategoryRecommended Vegetables
FallCarrots, Potatoes, Sweet Potatoes, Beets, Brussels Sprouts
WinterParsnips, Turnips, Winter Squash, Cabbage
SpringAsparagus, Leeks, Broccoli, Snap Peas
SummerZucchini, Eggplant, Bell Peppers, Tomatoes

“The secret to perfect steam roasting is understanding each vegetable’s unique characteristics.” – Professional Chef

Pro tip: Cut your vegetables into 1 to 1½ inch pieces for optimal cooking and browning. This size ensures even heat distribution and maximum caramelization at temperatures around 450°F.

Perfect Cutting Techniques for Even Cooking

Preparing vegetables for steam roasting needs precision and skill. The way you cut them greatly affects their cooking and taste. Learning the right cutting techniques ensures your veggies roast evenly and taste great.

Size and Shape Guidelines

Consistency is crucial when cutting vegetables. Aim for pieces that are 1 to 1½ inches in size. This size ensures even cooking and the best texture.

  • Wedges: Ideal for round vegetables like onions and squash
  • Batons: Perfect for carrots and zucchini
  • Crescents: Great for bell peppers
  • Large florets: Best for broccoli and cauliflower
  • Cubes: Versatile for most root vegetables

Common Cutting Mistakes to Avoid

Many home cooks make mistakes that can ruin their steam roasting results.

  1. Inconsistent sizing leads to uneven cooking
  2. Using dull knives creates ragged cuts
  3. Overcrowding the roasting pan prevents proper caramelization
  4. Cutting vegetables too small can cause burning

“Uniform cuts are the secret to perfectly roasted vegetables.” – Professional Chef Recommendation

By following these cutting techniques, you’ll improve your steam roasting. You’ll make vegetable dishes that taste like they’re from a restaurant, right in your kitchen.

Seasoning and Flavoring Options

Start by learning healthy cooking methods to boost flavor. The right seasonings can make simple roasted veggies into a feast. Knowing how to season your veggies makes every bite more tasty and fun.

Seasoning Steam Roasted Vegetables

Begin with olive oil, salt, and black pepper. These basics are the foundation for your roasted veggies. Use 1 to 2 tablespoons of oil for 4-8 cups of veggies.

Essential Seasoning Combinations

  • Mediterranean Blend: Dried oregano, rosemary, and thyme
  • Spicy Kick: Chipotle chile powder with a pinch of cayenne
  • Citrus Twist: Fresh lemon or orange juice
  • Herb Garden: Fresh basil and parsley

When to add herbs and spices is key. Add fresh herbs like basil after roasting to keep their flavor bright. Use dried herbs like thyme before roasting since they can handle high heat.

“The secret to amazing roasted vegetables is layering flavors and understanding when to add each ingredient.” – Professional Chef

Try new flavor combinations. A tablespoon of balsamic vinegar adds depth, and Parmesan cheese gives a savory finish. These small changes can make simple roasted veggies into unforgettable dishes.

Steam Roasting Time Chart by Vegetable Type

Learning how to steam roast vegetables means knowing the cooking times. Each vegetable needs a special roasting method to get the best flavor and texture.

It’s important to know the density and moisture of each veggie. This guide will teach you how to steam roast different vegetables.

Root Vegetables: Hearty and Dense

VegetableRoasting TimeTemperature
Sweet Potato35 minutes425°F
White Potato30 minutes425°F
Parsnips25 minutes425°F
Carrots25-30 minutes425°F
Beets35-40 minutes425°F

Cruciferous Vegetables: Robust Flavors

VegetableRoasting TimeTemperature
Brussels Sprouts35 minutes425°F
Cauliflower20 minutes425°F
Broccoli20 minutes425°F
Cabbage25 minutes425°F

Soft Vegetables: Quick and Delicate

VegetableRoasting TimeTemperature
Zucchini10 minutes425°F
Summer Squash10 minutes425°F
Bell Peppers15 minutes425°F
Tomatoes30 minutes425°F

Pro Tip: Always cut vegetables into similar-sized pieces to ensure even cooking when steam roasting.

“Perfect roasting is about understanding each vegetable’s unique characteristics and cooking times.” – Culinary Expert

Troubleshooting Common Steam Roasting Issues

Steam roasting veggies can be tricky, even for pros. Knowing common problems helps you get perfect results every time. It’s all about paying attention to detail and using the right techniques.

“Mastering steam roasting is about understanding how heat, moisture, and technique work together.” – Culinary Expert

Here are the most frequent challenges you might encounter during vegetable roasting:

  • Vegetables becoming too soft or mushy
  • Lack of proper browning or caramelization
  • Uneven cooking throughout the pan
  • Vegetables sticking to the roasting surface

To prevent these issues, consider the following strategies:

  1. Pan Selection: Use a rimmed baking sheet with low sides to promote air circulation
  2. Spacing: Ensure vegetables are spread in a single layer without overcrowding
  3. Oil Usage: Apply 2 tablespoons of olive oil per sheet pan
  4. Temperature Control: Maintain roasting temperatures between 400-450°F

Key techniques include stirring veggies halfway and watching for browning at the end. Each veggie needs a special touch – for example, eggplant needs more oil than root veggies.

Vegetable TypeOil RequirementRoasting Tip
BroccoliLess oilCut into similar-sized florets
EggplantMore oilSalt and drain before roasting
Root VegetablesModerate oilCut into 1.5-2 inch pieces

By mastering these tips, you’ll improve your steam roasting skills. You’ll make delicious, perfectly roasted veggies every time.

Tips for Achieving Perfect Caramelization

Mastering roasting techniques for cooking veggies is all about caramelization. The secret to perfectly browned veggies is in a few key strategies. These strategies turn simple produce into culinary wonders.

Temperature is key for ideal caramelization. The best oven temperature is 450°F. This temperature creates rich, golden-brown edges. Convection ovens also help by circulating hot air and removing moisture better.

  • Prepare vegetables in uniform sizes to ensure even cooking
  • Space vegetables separately on the baking sheet
  • Use a light coating of oil to promote browning
  • Rotate the pan midway through cooking

Different veggies caramelize at different rates. Root veggies like carrots and parsnips get darker faster than softer ones. Check them every 5 minutes to avoid burning and get that perfect texture.

“Caramelization is the transformation of simple ingredients into extraordinary flavors” – Professional Chef

Pro tip: Place your baking sheet on the oven floor for a hard sear. Cauliflower, broccolini, and brussels sprouts do great with this method. Remember, patience and careful watching are key to making restaurant-quality veggies at home.

Storage and Reheating Steam Roasted Vegetables

Storing vegetables for later is easy with the right methods. Steam roasted veggies can be kept for days, making them great for side dishes.

  • Cool veggies completely before storing
  • Use airtight containers in the fridge
  • Keep them in the fridge for up to 3 days
  • Keep different veggies separate to keep flavors distinct

Reheating is key to keep veggies crisp and flavorful. Try these methods:

  1. Oven method: Preheat to 425°F, spread on a baking sheet
  2. Skillet method: Medium-high heat with olive oil
  3. Quick microwave option: Heat in 30-second bursts

“The secret to perfect reheated vegetables is maintaining their original texture and flavor.” – Culinary Expert

Freezing is great for long-term storage. Put veggies in zip-lock bags, removing air. Frozen veggies last up to 2 months, perfect for quick meals.

Pro tip: Label containers with cooking date to track freshness and taste.

Conclusion

Learning how to steam roast vegetables opens up a world of flavors and health. This method keeps more nutrients than regular roasting. It makes veggies taste great and stay full of good stuff.

Steam roasting is a science-backed way to cook. It’s faster than regular ovens and keeps nutrients in. Your veggies will stay colorful, crunchy, and full of nutrients.

Start your steam roasting adventure today. Try different veggies and seasonings to make tasty, healthy meals. It’s a fun way to cook that’s good for you.

Steam roasting is great for anyone who loves to cook. It’s healthy and makes veggies taste amazing. Begin your journey and enjoy delicious, nutritious meals.

FAQ

What exactly is steam roasting?

Steam roasting is a cooking method that combines steaming and roasting. It starts by covering vegetables with foil to steam them. Then, the foil is removed to get a crispy, caramelized outside.

Do I need special equipment to steam roast vegetables?

No, you don’t need special equipment. Just a baking sheet, foil, and an oven. A steam oven is nice but not required for steam roasting at home.

Which vegetables work best for steam roasting?

Root veggies like carrots and potatoes are great. So are broccoli, cauliflower, and softer veggies like zucchini and bell peppers. Choose fresh, cut them the same size.

How long does it take to steam roast vegetables?

Cooking times vary. It’s 15-20 minutes of steaming, then 10-15 minutes without foil for caramelization. Thicker veggies take longer than thinner ones.

Can I add herbs and spices when steam roasting?

Yes! Add herbs like rosemary and thyme during steaming. Use delicate herbs like parsley after roasting to avoid burning.

What oil is best for steam roasting vegetables?

Olive oil is popular for its taste and health benefits. Avocado and grapeseed oils also work well because they don’t burn easily.

How do I prevent my vegetables from becoming mushy?

Cut veggies the same size and don’t overcrowd the sheet. Don’t over-steam. Remove foil when right to get a crispy outside.

Can I prepare steam roasted vegetables in advance?

Yes! Store them in an airtight container in the fridge for 3-4 days. Reheat in an oven or skillet to keep them crispy, not the microwave.

Is steam roasting a healthy cooking method?

Yes! It’s a healthy way to cook. It keeps more nutrients, uses little oil, and keeps veggies tasty and crunchy.

What temperature should I use for steam roasting?

Use 400-425°F (204-218°C). This temperature steams well and caramelizes without burning. Always preheat your oven for even cooking.

Technique #8: Genius Trick – How to Use Water to Sauté Vegetables Perfectly

how to use water to sauté vegetables

how to use water to sauté vegetables ? Ever looked at a skillet and wondered how to make veggies like a pro without too much oil? Water might be your secret ingredient. Water sautéing is a new way to cook veggies that’s changing how we prepare them at home .

Think about making veggies that are both tender and crisp, with bright colors and deep flavors. This method uses water to steam and brown veggies at the same time. Learning to sauté with water opens up a whole new world of healthy cooking.

Key Takeaways

  • Water sautéing reduces fat content in cooking
  • Technique preserves vegetable nutrients and color
  • Works best with various vegetable types
  • Simplifies cooking process compared to traditional methods
  • Creates restaurant-quality results at home
  • Enables precise texture control

Understanding the Water-Sautéing Revolution

Cooking fans are finding a new way to sauté veggies that changes the game. This method, called oil-free sautéing, is a big nutritional win. It shakes up cooking habits that have lasted for decades.

The water-sautéing method is a bold new choice over old oil-based cooking. It lets you make tasty meals with fewer calories and more nutrients. This is a big deal for anyone looking to eat better.

The Science Behind Water-Based Sautéing

Water-based sautéing uses a smart three-step process:

  • First, veggies get browned.
  • Then, water is added for a gentle steam.
  • Finally, the water evaporates to caramelize the veggies.

Benefits of Using Water Instead of Oil

No-fat sautéing brings big benefits:

  1. It cuts down on inflammatory compounds from heated oils.
  2. It keeps more nutrients in veggies.
  3. It also means fewer calories.

“Water sautéing maximizes nutritional value while minimizing health risks” – Culinary Nutrition Expert

Why Traditional Sautéing Methods Fall Short

Old oil-based methods often lead to:

  • Blackened veggie outsides.
  • Undercooked insides.
  • Too much fat.

Switching to water-sautéing opens up a healthier, more precise cooking way. It makes sure your veggies are cooked just right every time.

Essential Equipment for Perfect Water Sautéing

Mastering water sautéing is more than just cooking skills. The right tools can make your steam-fry veggies amazing. Let’s look at the key equipment that will improve your cooking.

Choosing the Right Pan Material and Size

A 12-inch skillet is perfect for water sautéing. Stainless steel or cast iron pans are best for heat and durability. When picking a pan, remember these important points:

  • Even heat distribution
  • Depth of at least 2-3 inches
  • Heavy-bottom construction
  • Tight-fitting lid

Important Pan Features for Water Sautéing

Not all pans are the same. For great water sautéing, look for these key features:

FeatureImportance
Straight SidesPrevents liquid spillage
Comfortable HandleReduces hand fatigue
Non-Reactive SurfacePrevents flavor contamination

Additional Tools and Accessories

Enhance your water sautéing setup with these useful accessories:

  1. Wooden spatula for stirring
  2. Kitchen tongs
  3. Measuring cups for precise water addition
  4. Vegetable chopper for consistent cuts

Pro tip: Invest in quality cookware. A great pan is the foundation of exceptional water sautéing.

With the right equipment, you’ll be ready to make perfectly steam-fried veggies. They’ll be both healthy and tasty.

How to Use Water to Sauté Vegetables

Learning to sauté vegetables with water can change your cooking game. This method cuts down on oil use while keeping flavors and nutrients intact. It’s easy to learn, making it great for cooks of all levels.

The water sautéing process has three key steps:

  1. Initial Browning: Start by heating your 12-inch skillet and adding veggies for spotty browning
  2. Water Steaming: Add a bit of water to steam and keep cooking
  3. Final Browning: Remove excess moisture for more caramelization

“Cooking vegetables without oil doesn’t mean sacrificing flavor – it means discovering a healthier cooking approach.”

Each vegetable needs its own water sauté tips. Broccoli and green beans work well, but zucchini might need a different approach.

Vegetable TypeWater Sauté ApproachCooking Time
BroccoliInitial browning, then steam5-7 minutes
MushroomsStart with water to release moisture4-6 minutes
Baby Bok ChoyCrisp stems, wilted leaves3-5 minutes

Don’t overcrowd your pan and flip veggies every minute for even cooking. With practice, you’ll sauté veggies perfectly in under 10 minutes.

Common Mistakes to Avoid When Water Sautéing

Water sautéing is a delicate cooking technique that needs precision and care. To master it, you must know the pitfalls that can ruin your vegetable prep.

Water Sautéing Mistakes Prevention

Temperature Control Challenges

When cooking veggies without oil, controlling the temperature is key. Chefs often make these mistakes:

  • Starting with a pan that’s too cold, preventing proper vegetable caramelization
  • Overheating the pan, which can quickly burn delicate vegetables
  • Not preheating the pan to the correct temperature for water sautéing

Timing and Water Management Errors

Getting the right amount of water is crucial in water sauté technique. Avoid these common mistakes:

  1. Adding too much water, which turns sautéing into steaming
  2. Not adding water at the right intervals
  3. Using water inconsistently across different vegetable types

“The secret to perfect water sautéing is understanding your ingredients and controlling moisture.”

Vegetable Preparation Pitfalls

Successful water sautéing starts before the pan heats up. Make sure to cut vegetables evenly and prepare them right for the best results:

  • Cutting vegetables into inconsistent sizes
  • Overcrowding the pan, which prevents proper cooking
  • Not patting vegetables dry before sautéing

By avoiding these common mistakes, you’ll improve your water sautéing skills. You’ll make delicious, perfectly cooked veggies every time.

Best Vegetables for Water Sautéing Technique

Mastering the water sauté technique is all about picking the right vegetables. Not every vegetable cooks the same way with this method. So, choosing the right ones is key to getting great results.

Vegetables react differently to water sautéing. Some release moisture easily, while others need careful handling of liquid.

  • Leafy Greens: Spinach, kale, Swiss chard
  • Crisp Vegetables: Broccoli, asparagus, green beans
  • Tender Vegetables: Zucchini, mushrooms, bell peppers

Mushrooms are a standout in water sautéing. They release their own moisture and don’t need much water. They turn golden brown in about 5 minutes. This makes them perfect for this cooking method.

Vegetable TypeWater Sauté CharacteristicsRecommended Cooking Time
Shiitake MushroomsSelf-liquefying, quick browning5-7 minutes
Swiss ChardTender stems, wilting leaves7 minutes
AsparagusCrisp texture, quick cooking4-6 minutes

“The secret to perfect water sautéing lies in understanding each vegetable’s unique cooking profile.” – Culinary Expert

When you’re sautéing vegetables, remember the importance of water. Start with about 2 tablespoons of water and add more as needed. Stir every two minutes to get even browning and prevent sticking.

Step-by-Step Water Sautéing Process

Learning to sauté vegetables with water is a game-changer. It’s a healthier way to cook than using oil. You can make tasty, nutritious dishes easily.

Water Sautéing Vegetables Technique

Initial Browning Phase

Start by heating a good pan over medium-high heat. Choose a pan with a thick bottom for even heat. Put your chopped veggies in the dry pan to get a golden-brown color without oil.

  • Use a non-stick or cast-iron skillet
  • Ensure pan is preheated before adding vegetables
  • Stir vegetables occasionally to prevent burning

Water Addition and Steaming

When veggies start to brown, add a bit of water. This creates a steamy environment. Cover the pan to keep moisture in and cook veggies fast. This method is great for dense veggies like carrots and broccoli.

“Water sautéing is about understanding heat, moisture, and vegetable characteristics” – Culinary Expert

Final Cooking and Seasoning

After steaming, take off the lid and let water evaporate. This step makes flavors richer and textures perfect. Add your favorite herbs or spices in the last minutes to boost flavor.

  1. Cook times vary by vegetable type
  2. Leafy greens need only 1-2 minutes
  3. Denser vegetables require 8-10 minutes
  4. Season just before removing from heat

By following these steps, you’ll make veggies that taste like they’re from a restaurant. They’re healthy and delicious.

Tips for Achieving Perfect Texture and Flavor

Learning water sauté tips can make your veggie cooking amazing. Cooking without oil needs precision and knowing key techniques. These skills can boost your cooking abilities.

Temperature control is key in water sautéing. Start with high heat for browning, then lower to medium-high for the best texture. Each veggie cooks differently:

  • Leafy greens like spinach need just 2-4 minutes
  • Hearty veggies like broccoli take up to 10 minutes
  • Softer veggies like zucchini cook well in 4-6 minutes

“The secret to perfect water sautéing lies in understanding each vegetable’s unique cooking characteristics.”

Seasoning is crucial for flavor. Pro tip: Add dried herbs and spices in the last 30 seconds. This boosts taste without harming texture. Use salt sparingly at the end to keep moisture in.

Choose a non-stick skillet for the best results. Use 2-4 tablespoons of water for harder veggies. This steaming effect ensures even cooking. Stir veggies just once or twice to get perfect browning.

Quick Cooking Time Guide

  • Frozen peas: 2 minutes
  • Mushrooms: 7 minutes
  • Bell peppers: 10-12 minutes
  • Carrots: 12 minutes

Cutting veggies evenly helps them cook the same. By following these water sauté tips, you’ll make veggies that taste great and are healthy.

Adapting the Technique for Different Vegetable Types

The water sauté technique is very flexible. But, you need to know how different veggies react to cooking. The way you cook veggies changes based on their texture, water content, and density.

Water Sauté Technique for Different Vegetables

Leafy Greens and Tender Vegetables

Leafy greens like spinach and kale need a gentle touch. They cook fast and can get mushy if cooked too long. Start with a hot pan and add just enough water to make steam. Cook for 2-3 minutes, stirring often to stop them from wilting.

  • Spinach: 1-2 minutes cooking time
  • Kale: 3-4 minutes cooking time
  • Swiss chard: 2-3 minutes cooking time

Root Vegetables and Dense Produce

Root veggies like carrots and parsnips need a different method. They take longer to cook and need more water to soften. Cut them into small pieces to cook evenly.

VegetableCooking TimeWater Quantity
Carrots4-5 minutes2-3 tablespoons
Parsnips5-6 minutes3-4 tablespoons
Turnips3-4 minutes2 tablespoons

High-Water Content Vegetables

Vegetables like zucchini and tomatoes are already moist. When water sautéing them, use little extra water to avoid them getting too wet. Cook them quickly at high heat, adding water now and then.

“Mastering water sauté technique is about understanding each vegetable’s unique characteristics.” – Culinary Expert

By adjusting your water sauté method for each veggie, you’ll make dishes that are both tasty and perfectly cooked every time.

Health Benefits and Nutritional Advantages

Water sautéing is a new way to cook veggies that keeps them full of nutrients. It’s a method that doesn’t use oil. This makes it great for your health and how well your body absorbs nutrients.

Nutrition experts have found many benefits in water-based cooking:

  • It keeps more vitamins and minerals than cooking with oil
  • It cuts down on calories without losing flavor
  • It helps keep important nutrients in the veggies

Studies show water sautéing has big nutritional benefits. A 2009 study found that some cooking methods can really change how much nutrients are in veggies. Microwaving with a little water can boost nutrients in veggies like zucchini, carrots, and beans by up to 30%.

“Cooking veggies smartly can make nutrients easier to absorb by breaking down tough cells” – Nutrition Research Institute

Using water sautéing as your main cooking method brings many health perks:

  1. It makes nutrients more available to your body
  2. It helps your body absorb minerals better
  3. It cuts down on calories
  4. It keeps more nutrients in the veggies

Also, cooking methods like water sautéing can make antioxidants easier to get. For example, cooked spinach and carrots have more beta carotene in your blood than raw ones. This helps your health and might even prevent diseases.

Conclusion

Learning how to use water to sauté vegetables has opened a new world in cooking. This method is great for keeping nutrients in your veggies while making them taste amazing. It’s a healthy way to cook that changes the game.

Using water to sauté means you cook with less fat and keep more nutrients in your food. This way, your veggies stay colorful, crunchy, and full of goodness. It makes your meals look good and feel good for you.

As you get better at water sautéing, you’ll love how easy and effective it is. It works for all kinds of veggies, from soft greens to thick roots. It lets you be creative in the kitchen while staying healthy.

Your kitchen is now ready for a big change. Water sautéing is not just a cooking trick. It’s a way to eat better, enjoy more flavors, and appreciate the natural taste of fresh veggies.

FAQ

What exactly is water sautéing?

Water sautéing is a cooking method that uses water instead of oil. It’s a healthier way to cook vegetables. You get similar results to sautéing with oil but with less fat and calories.

Is water sautéing really as effective as traditional oil sautéing?

Yes, water sautéing can be just as good as oil sautéing. It makes vegetables taste great and look nice without extra fat. You just need to control the heat and know how long to cook the veggies.

What type of pan works best for water sautéing?

Use a heavy, non-stick pan with a tight lid for water sautéing. Stainless steel or cast iron pans are best. The pan should be big enough for veggies to cook in one layer.

How much water should I use when water sautéing?

Start with 2-4 tablespoons of water for most veggies. Add more as needed. You want steam to cook the veggies without making them soggy.

Can I use this method for all types of vegetables?

Most veggies work well with water sautéing, but some better than others. Harder veggies like carrots take longer, while soft ones like spinach cook fast. Adjust cooking time based on the veggie’s type and water content.

What are the main health benefits of water sautéing?

Water sautéing is healthier because it cuts down on calories and preserves nutrients. It also avoids extra fats. This way, you can enjoy tasty meals without the extra fat.

How do I prevent vegetables from sticking when water sautéing?

Use a non-stick pan and start with a little water. Keep the heat high and stir often. If veggies stick, add more water and lower the heat a bit. A seasoned cast iron or non-stick pan helps prevent sticking.

Can I add seasonings during water sautéing?

Yes! You can add herbs, spices, and aromatics while cooking. Garlic, onions, and dried herbs go in at the start. Add fresh herbs towards the end to keep their flavor and color.

Looking for more delicious recipes to try? Explore these amazing dishes on American Tasty:

Join Our Community!

💬 Facebook: Stay updated with our latest recipes, cooking tips, and delicious inspiration. Join the conversation and share your creations with us on American Tasty’s Facebook page.

📌 Pinterest: Discover mouthwatering recipe ideas and save them for later! Follow our boards on American Tasty’s Pinterest for endless culinary inspiration.

✨ Why Join?

  • Get exclusive recipes and updates.
  • Share your food creations and inspire others.
  • Connect with a community of food lovers like you!

Technique #7 Perfectly Salted Veggies: Your Step-by-Step Guide

how to salt vegetables

Every kitchen adventure starts with a simple secret: mastering how to salt vegetables. I remember my grandmother’s hands hovering over a cutting board. She carefully sprinkled salt that transformed ordinary produce into extraordinary dishes. Those moments taught me that salting vegetables isn’t just about seasoning—it’s an art form that elevates every meal.

Salting techniques for veggies can dramatically change your cooking experience. Imagine crisp, flavorful vegetables that burst with taste in every bite. This guide will walk you through the precise methods to transform your vegetable preparation, turning simple ingredients into culinary masterpieces.

Whether you’re a home cook or aspiring chef, understanding how to salt vegetables is your gateway to creating restaurant-quality dishes right in your own kitchen. We’ll explore proven techniques that will boost your confidence and skill in the culinary world.

Key Takeaways

  • Salt is a powerful flavor enhancer for vegetables
  • Different vegetables require unique salting approaches
  • Proper salting can improve texture and moisture retention
  • Timing of salt application significantly impacts flavor
  • Balance is crucial to avoid over-salting

Understanding Salt’s Role in Vegetable Preparation

Salt is a game-changer in vegetable seasoning methods. It’s not just about adding flavor—salt transforms the way vegetables taste, look, and feel on your plate. Understanding the science behind salt can elevate your cooking from basic to brilliant.

Salt Types for Vegetable Seasoning

Different salts bring unique characteristics to your vegetable dishes. Here are the top salt varieties for cooking:

  • Kosher Salt: Ideal for general vegetable seasoning
  • Sea Salt: Provides mineral-rich flavor profiles
  • Himalayan Pink Salt: Offers trace minerals and subtle taste
  • Flaky Finishing Salt: Perfect for adding texture

How Salt Affects Vegetable Texture

Salt amounts for vegetable dishes can dramatically change their texture. When you salt vegetables, you trigger osmosis—water moves out of plant cells, concentrating flavors and changing consistency.

“Salt is the difference between eating and dining.” – Anonymous Chef

The Science Behind Salt and Vegetables

At a 2% salt concentration, most vegetables ferment beautifully. This precise measurement helps preserve nutrients while enhancing taste. For example:

  • Garlic and beetroot thrive with 2% salt
  • Cucumbers prefer 3-4% salt concentration
  • Delicate vegetables need lighter salting

Mastering salt amounts for vegetable dishes transforms your cooking from ordinary to extraordinary. Experiment with different salts and concentrations to discover your perfect flavor profile.

How to Salt Vegetables: Essential Methods

Learning to salt vegetables is an art that makes simple produce into amazing dishes. It’s key for both raw and cooked veggies. Knowing how to salt can boost your cooking and keep food fresh.

Salting raw veggies uses several methods to boost flavor and keep them fresh. Here are the top ways:

  • Direct seasoning
  • Salt-water soaking
  • Dry brining
  • Wild fermentation

For direct seasoning, sprinkle kosher or sea salt lightly on raw veggies. This is best for crisp veggies like cucumbers, tomatoes, and leafy greens. The salt pulls out moisture, making flavors stronger.

“Salt is the magic ingredient that transforms simple vegetables into culinary masterpieces.” – Culinary Expert

Salt-water soaking is another great way to salt raw veggies. Mix 1 tablespoon of salt with a gallon of water. Soak veggies for 5-10 minutes to clean and prepare them.

Vegetable TypeSalt MethodRecommended Time
Leafy GreensSaltwater Soak5-10 minutes
Root VegetablesLight Salting2-3 minutes
Cruciferous VegetablesDry Brining15-20 minutes

Dry brining means applying salt directly to veggies without water. It’s great for veggies like zucchini, eggplant, and tomatoes. The salt removes excess moisture, making flavors stronger and textures better.

When salting raw veggies, be precise. Start with a little salt and adjust to taste. Consider the type of veggie you’re using.

The Perfect Salt-to-Vegetable Ratio Guide

Learning how to use salt in veggie recipes is an art. It can make your cooking go from bland to amazing. Knowing the right amount of salt for each vegetable ensures your meals are always seasoned just right.

The amount of salt you use depends on the vegetable and how you cook it. Different veggies need different seasoning levels to bring out their best flavors and textures.

Leafy Greens Salting Measurements

Leafy greens like spinach and kale need a light hand when salting. Here’s a quick guide:

  • Spinach: 1/4 teaspoon per cup
  • Kale: 1/2 teaspoon per cup
  • Swiss chard: 1/3 teaspoon per cup

Root Vegetables Salt Proportions

Root veggies like carrots and potatoes need more salt because they’re denser:

VegetableSalt RatioRecommended Amount
Carrots2.2%1 1/2 teaspoons per quart
Potatoes2.5%2 teaspoons per quart
Beets2.2%21 grams per quart

Cruciferous Vegetables Salt Guidelines

Broccoli, cauliflower, and cabbage need specific salt levels for the best fermentation:

  • Broccoli: 1.5% – 3% brine concentration
  • Cauliflower: 15-30 grams of salt per liter of water
  • Cabbage: Typically 2.2% salt ratio for sauerkraut

“The right amount of salt can elevate your vegetables from ordinary to extraordinary.” – Culinary Expert

Pro tip: Always adjust salt levels based on personal taste and specific cooking methods.

Brining Techniques for Maximum Flavor

Vegetable Brining Techniques

Learning how to brine produce can make your vegetable dishes amazing. Brining is a way to add deep flavor and improve texture to veggies.

Brining works by letting vegetables soak up moisture and flavor from salt. Each veggie reacts differently, opening up new flavors in cooking.

“Salt should be added earlier in the cooking process to achieve a more integrated flavor profile.” – Culinary Expert

Key Brining Methods

  • Wet Brining: Submerging vegetables in saltwater solution
  • Dry Brining: Directly applying salt to vegetable surface
  • Quick Brining: Short-term salt exposure for rapid flavor enhancement

Optimal Brining Recommendations

VegetableBrine ConcentrationRecommended Duration
Green Beans5-8%30-4 hours
Potatoes5-8%30-4 hours
Cauliflower5%Up to 1 hour

Pro tip: Avoid brining vegetables for more than 12 hours, as this can lead to overly salty or wilted produce.

Brining Best Practices

  1. Use cold water for brining
  2. Ensure vegetables are fully submerged
  3. Maintain proper salt-to-water ratio
  4. Rinse vegetables after brining to remove excess salt

Try brining different veggies like carrots, asparagus, and zucchini. Find your favorite ways to brine. Remember, the more you practice, the better you’ll get!

Pre-Salting vs. Post-Cooking Seasoning

Seasoning fresh produce right is all about when you add salt. The timing can change how your veggies taste and feel.

Seasoning veggies with salt is more than just adding salt. It depends on six key things:

  • Ingredient type
  • Preparation method
  • Desired cooking outcome
  • Salt quantity
  • Timing of salt addition
  • Salt variety

Benefits of Pre-Salting

Pre-salting has special perks for veggies. Leafy greens get crisper, and some veggies get better texture. For example, pre-salting broccoli before steaming makes it stronger.

“Salt is the silent chef that transforms ingredients from ordinary to extraordinary.”

When to Salt After Cooking

Not every veggie is good for pre-salting. Some might get too wet or tough. For these, seasoning after cooking is better. It lets you control flavor and keeps texture right.

Choose your salt approach based on each veggie’s needs. Some need gentle care, while others can handle more.

  • Robust vegetables: Pre-salt generously
  • Delicate vegetables: Salt after cooking
  • Mixed dishes: Layer salt at different stages

Getting good at salting helps veggies keep their natural taste. It also makes them taste and feel their best.

Common Mistakes in Vegetable Salting

Vegetable Salting Techniques

Learning to salt vegetables right isn’t easy. Even skilled cooks can make mistakes. It takes practice and knowledge to get it right.

Here are the top mistakes to watch out for:

  • Over-Salting: Too much salt can ruin the vegetable’s taste
  • Uneven Salt Distribution: Not spreading salt evenly leads to bad seasoning
  • Incorrect Timing: Salting at the wrong time can mess up texture and taste

Getting the salt right is key. About 60% of home cooks struggle with this. The right amount of salt is usually 1.5% to 2.5% of the vegetable’s weight.

“Salt is the difference between a bland dish and a memorable meal.” – Professional Chef

Each vegetable needs a special way of salting. Soft veggies like tomatoes need 30 minutes. Crunchier ones, like cabbage, might need an hour.

  • Leafy greens: Gentle salt massage
  • Root vegetables: Moderate salting
  • Cruciferous vegetables: Longer salting times

Avoiding these mistakes can make your veggies taste amazing. Knowing how to salt them right makes every dish a hit.

Season Like a Pro: Restaurant Techniques

Professional chefs see vegetable seasoning as an art. It turns simple dishes into amazing meals. They know how to use salt to bring out the best in veggies.

Salt is key to adding depth and flavor. Chefs say to season food at every stage of cooking. This builds a rich taste.

Layering Salt Flavors

Flavor layering is all about when and how to use salt:

  • Start with a pinch of salt during initial cooking
  • Taste and adjust seasoning progressively
  • Use kosher salt for better flavor distribution
  • Add salt in small increments to control intensity

“Salt is the difference between a good dish and an extraordinary one.” – Professional Chef Wisdom

Timing Your Salt Application

Knowing when to add salt is key. Different veggies need different approaches:

  1. Root vegetables: Salt before roasting
  2. Leafy greens: Salt just before serving
  3. Cruciferous vegetables: Salt midway through cooking

Pro tip: Always taste your dish after salting. This ensures the flavor is balanced. The aim is to enhance, not overpower, the natural taste of the veggies.

Salt-Free Alternatives and Substitutes

Salt-Free Vegetable Seasoning Alternatives

Reducing salt in veggie recipes doesn’t mean losing flavor. If salt is a health concern, many tasty alternatives can change your cooking.

Looking into salt-free options can spark creativity in the kitchen. Fresh herbs and spices add great taste without sodium.

  • Fresh Herbs: Basil, thyme, rosemary, and oregano bring strong flavors
  • Spice Blends: Cumin, paprika, and garlic powder offer deep tastes
  • Citrus Zests: Lemon and orange rinds make dishes bright
  • Vinegars: Balsamic and apple cider vinegars add depth without sodium

Potassium chloride-based salt substitutes are great for those watching sodium. Nearly 50% of adults face high blood pressure, making these options very important.

“Flavor doesn’t have to come from salt – nature provides countless delicious alternatives.” – Culinary Nutrition Expert

Here are some tips for low-sodium veggie prep:

  1. Roast vegetables to bring out their natural sweetness
  2. Try new herb mixes
  3. Use sodium-free seasoning blends
  4. Add aromatic ingredients like ginger and garlic

The American Heart Association suggests a daily sodium limit of 2,300 milligrams. Using these salt-free options can lead to healthier, tasty meals.

Specialty Salts for Different Vegetables

Take your vegetable dishes to the next level with specialty salts. Not all salt is the same. The right salt can make a big difference in flavor.

  • Fleur de Sel: A delicate sea salt perfect for delicate vegetables like asparagus and baby greens
  • Smoked Salt: Ideal for robust vegetables like grilled zucchini or roasted Brussels sprouts
  • Black Lava Salt: Adds dramatic visual and flavor impact to root vegetables
  • Himalayan Pink Salt: Provides mineral-rich seasoning for hearty vegetable dishes

“Specialty salts are not just about saltiness, but about creating layers of flavor in your dishes.” – Culinary Expert

Specialty salts can change how you season vegetables. Each salt has its own minerals and texture. These interact differently with various vegetables.

Salt TypeBest Vegetable PairingsFlavor Profile
Fleur de SelLeafy Greens, Delicate VegetablesSubtle, Mineral-Rich
Smoked SaltGrilled Vegetables, Root VegetablesIntense, Smoky
Himalayan Pink SaltRoasted Vegetables, Hearty DishesRich, Mineral-Forward

Pro tip: Start with small amounts of specialty salts. See which ones work best with your favorite vegetables. Remember, a little goes a long way in adding flavor.

Health Considerations When Salting Vegetables

It’s important to find the right balance between taste and nutrition when seasoning veggies. Salt is key in cooking veggies, but we must watch our sodium intake for health.

Sodium Content Awareness

Americans eat about five teaspoons of salt each day. This is way more than our bodies need. We only need about 1/4 teaspoon of salt daily. So, it’s key to keep an eye on salt in our veggie recipes.

  • Daily sodium intake target: Less than 2,000 milligrams
  • Low-sodium foods: Contains less than 140 mg per serving
  • High-sodium foods: Contains 400 mg or more per serving

Balancing Flavor and Health

It’s possible to make tasty veggie dishes without harming your health. With smart seasoning, you can boost flavor while controlling sodium.

Food CategorySodium ConsiderationsRecommended Alternatives
Canned VegetablesHigh SodiumFresh or Frozen Vegetables
Processed FoodsExcessive SodiumHome-Cooked Meals
Pickled ItemsVery High SodiumFresh Vegetables

“Salt is a powerful ingredient, but moderation is key to maintaining both flavor and health.” – Culinary Nutrition Expert

Healthy Vegetable Seasoning Techniques

Knowing how salt works in cooking veggies and making smart choices can lead to healthy, tasty meals. This supports your overall well-being.

Storage Tips for Salted Vegetables

Keeping your salted vegetables fresh is key. After you’ve salted them, how you store them matters a lot. It helps keep the taste and makes them last longer.

Here are some important storage tips:

  • Use airtight containers to prevent moisture and bacteria
  • Store brined produce in cool, dark locations
  • Refrigerate vegetables after the brining process for produce
  • Check stored vegetables weekly for any signs of spoilage

“The secret to great vegetable preservation is understanding the delicate balance of salt and storage conditions.” – Culinary Preservation Expert

Each vegetable needs its own storage method. Root veggies do well with a light sprinkle of salt to stop rot. Leafy greens can be kept fresh by soaking them in saltwater for a few minutes before chilling.

Temperature is also very important. Most salted veggies stay good between 32-40°F (0-4°C). Dried veggies preserved with salt can last months in sealed containers.

Practical Storage Recommendations

  1. Use glass or ceramic containers for brined vegetables
  2. Label containers with the date of salting
  3. Maintain consistent refrigeration
  4. Consume within recommended time frames

Pro tip: Always trust your senses. If a salted vegetable looks, smells, or tastes off, it’s best to discard it.

Seasonal Adjustments for Salt Levels

Knowing how seasons change vegetable flavors is key to perfecting your salting. Each season brings its own challenges and chances for seasoning your favorite veggies.

Your salting method should change with the seasons. Salt amounts for veggies can vary with the season’s characteristics.

  • Summer Vegetables: Typically more water-rich and sweeter
    Recommendation: Use less salt, as natural flavors are more pronounced
  • Winter Vegetables: Often denser and less moisture-intensive
    Recommendation: Slightly increase salt to enhance depth of flavor
  • Spring Produce: Tender and delicate
    Recommendation: Minimal salting to preserve subtle tastes
  • Autumn Vegetables: Robust and earthy
    Recommendation: Moderate salt levels to complement rich flavors

Professional chefs suggest adjusting your salting tips for veggies with the seasons. A good rule is to use about 1/2 teaspoon of salt per pound of veggies. But, adjust this based on the season.

“Seasonality transforms vegetables from simple ingredients to culinary experiences.” – Chef Marcus Rodriguez

Try different salt levels and taste as you go. Your taste buds are the best guide to mastering seasoning veggies by season.

Conclusion

Learning to salt vegetables is more than a cooking trick. It’s a journey that turns simple produce into amazing dishes. You’ve learned how to make flavors pop, keep food fresh, and cut down on waste.

Salt is not just for flavor; it’s a food saver. It keeps leafy greens fresh and stops bacteria in root veggies. With the right salt techniques, you can store veggies for up to 6 months, keeping them tasty and nutritious.

Keep trying out different salting methods. Each veggie needs its own special touch. Whether it’s cucumbers or cabbage, be curious and confident. Your skills will make your cooking better, reduce waste, and create lasting, tasty veggie dishes.

Looking for more delicious recipes to try? Explore these amazing dishes on American Tasty:

Join Our Community!

💬 Facebook: Stay updated with our latest recipes, cooking tips, and delicious inspiration. Join the conversation and share your creations with us on American Tasty’s Facebook page.

📌 Pinterest: Discover mouthwatering recipe ideas and save them for later! Follow our boards on American Tasty’s Pinterest for endless culinary inspiration.

✨ Why Join?

  • Get exclusive recipes and updates.
  • Share your food creations and inspire others.
  • Connect with a community of food lovers like you!

FAQ

How much salt should I use when seasoning vegetables?

The amount of salt depends on the vegetable and your taste. Start with a light sprinkle and taste as you go. For most vegetables, 1/4 to 1/2 teaspoon of salt per pound is good.

Root vegetables and cruciferous veggies need more salt. Leafy greens need less.

When is the best time to salt vegetables – before or after cooking?

It depends on the cooking method and vegetable type. Pre-salting helps for roasting or grilling. It draws out moisture and concentrates flavors.

For delicate vegetables like leafy greens, salt just before or after cooking. This prevents wilting. Brining is good for hardy vegetables to enhance flavor and texture before cooking.

Can I reduce salt while still keeping my vegetables flavorful?

Absolutely! Use herbs, spices, citrus zest, or flavored vinegars instead. Specialty salts like smoked salt or sea salt can add flavor with less sodium.

You can also use salt-free herb blends or fresh aromatics like garlic, ginger, or fresh herbs. These add depth to your vegetable dishes.

How do different types of salt affect vegetable flavor?

Each salt type adds unique characteristics. Kosher salt provides clean seasoning. Sea salt offers mineral complexity.

Flaky salt adds texture and flavor. Smoked salt introduces a smoky note. Specialty salts like fleur de sel can elevate simple dishes with their delicate flavors.

What’s the best way to avoid over-salting vegetables?

Start with a small amount of salt and taste as you go. Use the right salting method for your vegetable type. Brining for root vegetables, light sprinkle for leafy greens.

If you’ve over-salted, add acid (like lemon juice), more vegetables, or a starch like potato to absorb excess salt.

Are there health considerations I should keep in mind when salting vegetables?

Salt enhances flavor but be mindful of sodium intake. Use low-sodium alternatives, herbs, and spices. Use salt strategically.

If you have dietary restrictions, consult a nutritionist about sodium intake. Remember, fresh vegetables are nutritious. Salt should complement, not overpower, their natural flavors.

How do seasonal variations affect salting vegetables?

Seasonal produce varies in salt content and sweetness. Summer vegetables are sweeter and might need less salt. Winter vegetables might need more seasoning.

Always taste your vegetables and adjust seasoning accordingly. Fresh, in-season produce often needs minimal salt to shine.

Technique #5 : Finish with a Sprinkle or Drizzle to Elevate Flavor

how to season after cooking

Turning a simple meal into a masterpiece is all about seasoning after cooking. Professional chefs know that the last touch can make a huge difference. It can turn basic ingredients into something truly special.

Seasoning after cooking lets you fine-tune the taste. You can drizzle olive oil, sprinkle herbs, or add finishing salt. These steps can reveal new flavors in your dishes.

When you season after cooking, your kitchen becomes a place of discovery. The right touch can bring out new tastes and textures. It makes every meal a unique experience.

Learning these techniques lets you make dishes that rival those in restaurants. You can use herbs, spices, or special oils to enhance your cooking. It’s a way to express your creativity in the kitchen.

Understanding Post-Cooking Seasoning Fundamentals

Seasoning after cooking is key to making dishes stand out. It can turn simple meals into unforgettable ones. Learning how to season after cooking can make a big difference.

Professional chefs know seasoning is more than just salt and pepper. It’s an art that needs thought about flavor balance and timing.

Basic Principles of Final Seasoning

There are four main things to keep in mind for seasoning after cooking:

  • Sweet: Balances overall flavor complexity
  • Sour: Adds brightness and depth
  • Salt: Enhances existing flavors
  • Spice: Provides aromatic intensity

Impact on Flavor Development

How you season after cooking can change a dish’s taste a lot. Strategic final seasoning lets you tweak flavors without changing the cooking.

Seasoning is about creating harmony between ingredients, not overwhelming them.

Temperature Considerations

Temperature RangeFlavor PerceptionSeasoning Recommendation
Cold (Below 40°F)Muted flavorsIncrease seasoning slightly
Room Temperature (68-72°F)Balanced flavor perceptionStandard seasoning approach
Hot (Above 140°F)Enhanced flavor intensityUse lighter seasoning touch

Knowing these seasoning techniques can help you make meals like a pro. It turns simple ingredients into amazing dishes.

Essential Tools and Ingredients for Final Touches

Adding flavor after cooking is an art that needs the right tools and ingredients. Professional chefs know it’s not just about salt. It’s about precision, creativity, and the right tools.

  • High-quality salt collection
    • Flaky sea salt
    • Flavored finishing salts
    • Specialty regional salts
  • Precision tools
    • 4-inch tweezers for delicate placement
    • Microplane for zesting
    • Pepper mills with adjustable grind settings

“The difference between a good dish and a great dish often lies in those final touches.” – Professional Chef Perspective

For enhancing flavor, you’ll also need specialized dispensers. Oil drizzlers with narrow spouts help with precise application. Herb scissors make quick work of cutting fresh herbs.

CategoryEssential ItemsPurpose
SeasoningFinishing SaltsTexture and flavor enhancement
ApplicationPrecision TweezersDetailed ingredient placement
HerbsHerb ScissorsPrecise herb cutting

Remember, the secret to great flavor after cooking is fresh, high-quality ingredients and the right tools. Invest in your culinary toolkit. Elevate every dish with professional-level finishing touches.

The Art of How to Season After Cooking

Learning to season after cooking is key to making a dish stand out. It’s about precision, timing, and knowing how flavors work together.

Top chefs say the right seasoning at the end can change a meal’s taste. A study found 78% of chefs think the last seasoning is crucial.

Timing Your Final Seasonings

When you add seasonings is important. Here are some tips:

  • Add fresh herbs right before serving to keep their flavor bright
  • Put salt on food just after cooking to boost its taste
  • Let hot dishes rest a bit before seasoning to let flavors meld

Layering Flavors Effectively

To add depth to your dishes, layer flavors wisely. Think of seasoning like painting – each layer adds complexity and richness.

“Seasoning is the difference between a good meal and an unforgettable experience.” – Culinary Expert

Temperature Impact on Seasoning

Temperature affects how seasonings work with food. Warm dishes soak up seasonings better, making flavors spread out.

  • Warm foods open up flavor receptors
  • Cool temperatures can dull seasoning effects
  • Ingredients at room temperature take seasonings best

By mastering these seasoning techniques, you’ll improve your cooking. You’ll make dishes that are not only tasty but also memorable.

Choosing the Right Finishing Salts

Finding the perfect finishing salt can make your dishes amazing. Seasonings for cooked food get better when you pick the right salt. Not all salts are the same, and knowing their differences is crucial for chefs.

Finishing Salt Varieties

There are many types of finishing salts, each with its own flavor and texture:

  • Maldon Salt: Pyramid-shaped flakes from Essex, perfect for adding crunch
  • Fleur de Sel: Hand-harvested French sea salt with delicate texture
  • Himalayan Pink Salt: Mineral-rich salt with a subtle pink hue
  • Sel Gris: Celtic sea salt with robust minerality

Choosing the right finishing salt depends on your dish and flavor profile. Chefs say to pick salts that enhance, not overpower, your meal’s flavors.

Salt TypeSodium ContentBest Used For
Fleur de Sel37%Delicate dishes, desserts
Himalayan Pink Salt37%Garnishing, light seasoning
Celtic Grey Sea Salt34%Versatile finishing

“Salt is the difference between a good meal and a great one.” – Professional Chef Insight

Pro tip: Use finishing salts sparingly. Sprinkle just before serving to keep crystals intact and boost flavor. The aim is to add to, not dominate, your dish.

Herb-Based Final Touches

Adding herbs to your dishes can turn a simple meal into a work of art. Herbs add vibrant flavors and aromatic touches that excite our senses.

Fresh vs Dried Herbs: Understanding the Difference

Deciding between fresh and dried herbs is key to seasoning. Only 30% of home cooks use fresh herbs, which can enhance flavors.

  • Fresh herbs have brighter, more intense flavors
  • Dried herbs last longer (1-3 years)
  • Some herbs work better in certain forms

Optimal Herb Combinations for Maximum Flavor

Herb CombinationRecommended CuisineFlavor Profile
Basil + OreganoItalianBright, Aromatic
Cilantro + MintMexicanFresh, Zesty
Thyme + RosemaryMediterraneanEarthy, Robust

Storage and Preparation Tips

Keeping herbs fresh is crucial for seasoning. You can freeze herbs in oil for 6-9 months, making cooking easier.

“The right herb at the right moment can elevate a simple dish to extraordinary” – Culinary Experts

  • Store fresh herbs in sealed containers
  • Rinse herbs just before use
  • Chop herbs finely for even distribution
  • Add delicate herbs like basil at the end of cooking

Flavored Oils and Vinegars for Drizzling

Learn to add flavor after cooking with specialty oils and vinegars. These magical condiments can turn simple dishes into amazing meals with just a drizzle.

Flavored Oils and Vinegars for Seasoning Techniques

Using flavored oils and vinegars takes your cooking to the next level. Each drop can make your dish taste better, turning simple meals into gourmet dishes.

“A few drops of the right flavored oil can turn a basic dish into a masterpiece” – Culinary Experts

Popular Flavored Oils to Transform Your Cooking

  • Truffle oil – Luxurious finish for pasta and risottos
  • Chili oil – Adds spicy kick to Asian dishes
  • Garlic-infused oil – Perfect for sautéing and pasta
  • Toasted sesame oil – Ideal for Asian cuisine finishing touches

Gourmet flavor-infused extra virgin olive oils are becoming popular in home kitchens. They make it easy to add depth and complexity to your meals.

Drizzling Techniques and Ratios

Oil TypeBest UsesRecommended Quantity
White Truffle OilFinishing risottos, eggs2-3 drops
Basil-Infused OilCaprese salad, tomato dishes1-2 teaspoons
Chili OilSoups, stir-fries1/2 teaspoon

When adding flavor after cooking, remember that less is more. A few strategic drops can transform your dish without overwhelming its original taste.

Creative Vinegar Pairings

  • Balsamic vinegar – Perfect for salads and roasted vegetables
  • Fruit-infused vinegars – Excellent for marinades and dressings
  • Herb-infused vinegars – Great for enhancing vegetable dishes

Try mixing two parts flavor-infused olive oil with one part balsamic vinegar. This creates stunning dipping sauces that will wow your guests.

Elevating Dishes with Specialty Seasonings

Turning simple meals into amazing dishes needs more than just cooking skills. Using special seasonings can make a big difference. It can turn basic dishes into gourmet delights.

Professional chefs know that the right touch can change everything. Studies show that 78% of chefs suggest adding a special sprinkle or drizzle. This can really boost the flavor and look of a dish.

Exotic Spice Blends: A Culinary Adventure

Discover new flavors with unique spice mixes that can change your dishes instantly:

  • Za’atar: A Middle Eastern blend perfect for roasted vegetables
  • Togarashi: Japanese spice mix ideal for seafood and rice dishes
  • Dukkah: Egyptian nut and herb blend great for meats and salads

Regional Finishing Touches

Each cuisine has its own way to add flavor after cooking. Some standout techniques include:

  1. Italian gremolata for bright, herbaceous notes
  2. Japanese furikake for umami-rich seafood garnishes
  3. Mexican tajín for citrusy, spicy complexity

Artisanal Products: Elevating Home Cooking

Invest in top-quality, small-batch seasonings to make your dishes better. Amazingly, 60% of diners are ready to pay more for meals with gourmet ingredients. This includes special salts and truffle-infused products.

“Great seasoning is the difference between a good meal and an unforgettable experience.” – Culinary Institute of America

By using these special seasonings, you’ll not only improve the taste but also make your dishes look great. They will impress even the pickiest eaters.

Texture Enhancement Through Toppings

Texture is key in making dishes memorable. It’s not just about taste; it’s about a full sensory experience. This experience pleases both the taste buds and the eyes.

Texture Enhancement in Cooking

Crunchy toppings can change a dish completely. Delish has over 300 recipes that show how crispy textures can make a big difference. A simple sprinkle can turn a simple dish into something amazing.

  • Toasted nuts for nutty crunch
  • Crispy fried herbs for aromatic texture
  • Panko breadcrumbs for golden-brown layers
  • Crisp vegetable garnishes

“The auditory experience of crunch amplifies focus and enjoyment of food.” – John S. Allen, Anthropologist

Professional chefs see texture as an art. The Maillard reaction helps create perfect crispy elements. Shocking sliced veggies in ice can make them 10 times crunchier.

ToppingTexture ImpactBest Used With
Toasted PankoCrisp and GoldenPasta, Salads, Proteins
Fried HerbsDelicate CrunchSoups, Proteins, Vegetables
Toasted NutsRich, Robust CrunchSalads, Desserts, Grain Dishes

Pro tip: Think about contrast when adding texture. A crispy topping on a creamy dish is exciting. It keeps diners interested from start to finish.

Balancing Flavors in Final Seasoning

Mastering the art of seasoning after cooking can turn simple dishes into amazing meals. Learning to balance flavors is key to making your cooking stand out. It can take your dishes from good to great.

Seasoning cooked meals is all about mixing tastes carefully. It’s important to know how different flavors work together. This way, you can create dishes that are truly special.

Sweet and Savory Combinations

Mixing sweet and savory flavors adds depth to your food. Here are some great pairings to try:

  • Honey glazed on roasted vegetables
  • Maple syrup with bacon
  • Fruit chutneys with grilled meats

Acid and Heat Balance

Acidic and spicy flavors can really make your dish pop. Citrus and chili are a great combo. They wake up your taste buds and make your meal exciting.

Acid SourceHeat SourceRecommended Pairing
Lime JuiceJalapeñoMexican-inspired dishes
VinegarRed Pepper FlakesStir-fry recipes
LemonSrirachaSeafood preparations

Umami Enhancement

“Umami is the secret weapon of professional chefs in creating deeply satisfying flavors.” – Culinary Institute of America

Boost umami with smart seasoning choices like:

  1. Sprinkling parmesan cheese
  2. Adding soy sauce drops
  3. Using mushroom powder

By mastering these flavor balancing techniques, you’ll take your cooking to the next level. Your meals will be full of flavor and complexity.

Common Mistakes to Avoid When Finishing Dishes

Post-Preparation Seasoning Techniques

Learning how to season your food after cooking can make a big difference. Many home cooks make mistakes that hurt their dishes’ taste. These mistakes can turn a simple meal into a disaster.

“The difference between a good dish and a great one often lies in the final seasoning touches.” – Professional Chef’s Wisdom

Here are some common mistakes to watch out for:

  • Oversalting: Too much salt can ruin a dish
  • Using old or low-quality seasonings that don’t taste good
  • Adding wet seasonings to foods that should be crispy
  • Not tasting and adjusting the seasoning before serving

Ground spices lose their flavor fast. Chefs say to replace your spices every nine months for the best taste. Sadly, 90% of home cooks keep using old spices, which affects their dishes’ flavor.

Here are some smart ways to season your food:

  1. Keep your seasonings close by
  2. Taste your dish before adding the final seasoning
  3. Use fresh herbs and good-quality finishing salts
  4. Season from above for even coverage

If your dish tastes too salty, don’t worry. You can fix it. Try diluting it with unseasoned ingredients, adding a bit of lemon juice, or balancing it with something sweet. The trick is to make small adjustments during seasoning.

Professional Chef Tips for Perfect Final Touches

Turning a good dish into an amazing meal needs mastering seasoning after cooking. Professional chefs say the last touches can make a big difference in taste and look.

  • Start with mise en place to organize ingredients before seasoning
  • Choose fresh, quality ingredients for the best taste
  • Balance flavors with careful seasoning

Restaurant-Inspired Techniques

Professional kitchens use special methods to make dishes unforgettable. They start building flavors early, not just at the end. Chefs suggest tasting and adjusting seasonings as you cook.

Plating Strategies That Wow

How a dish looks is as important as how it tastes. Experts say a good presentation can make flavors seem 20% better. Here are some plating tips:

  1. Use white plates to make food look better
  2. Add height and depth to your dish
  3. Include different textures

Timing Is Everything

Getting the timing right for final touches is key. A squeeze of lemon or a sprinkle of sea salt can change a dish quickly. The Maldon sea salt method, used by 85% of chefs, adds a perfect crunch.

“The difference between good and great cooking is often just a pinch of carefully chosen seasoning.” – Top Chef Insight

TechniqueImpactRecommended Usage
Fresh Herb FinishIncreases FreshnessLast 30 seconds of cooking
Acid SplashEnhances Flavor PerceptionImmediately before serving
Sea Salt SprinkleAdds TextureFinal garnish

By using these professional seasoning techniques, you can turn simple meals into unforgettable culinary experiences.

Conclusion

Your journey into seasoning after cooking has shown how powerful it can be. By learning how to add flavors at the end, you can make your meals truly special. It’s all about the right touch, like a sprinkle of special salt or a fresh herb garnish.

Research shows that seasoned dishes can taste up to 30% better. So, your final touches are key to making meals unforgettable. Now, you know how to make every meal a masterpiece with the right seasoning techniques.

Seasoning well is about finding the right balance and trying new things. Start with a little seasoning to let the natural flavors stand out. Whether it’s a steak or seafood, a gentle touch can make your dishes taste like they’re from a restaurant.

Mastering seasoning is more than just cooking. It’s a chance to explore, create, and enjoy the art of flavor. Trust your taste and keep trying new things. Every dish can be a masterpiece with the right finishing touches.

Looking for more delicious recipes to try? Explore these amazing dishes on American Tasty:

Join Our Community!

💬 Facebook: Stay updated with our latest recipes, cooking tips, and delicious inspiration. Join the conversation and share your creations with us on American Tasty’s Facebook page.

📌 Pinterest: Discover mouthwatering recipe ideas and save them for later! Follow our boards on American Tasty’s Pinterest for endless culinary inspiration.

✨ Why Join?

  • Get exclusive recipes and updates.
  • Share your food creations and inspire others.
  • Connect with a community of food lovers like you!

FAQ

What is post-cooking seasoning?

Post-cooking seasoning is when you add herbs, spices, or salts to food after it’s cooked. It lets you fine-tune the flavor, making your meal taste better with a final seasoning touch.

When is the best time to add seasonings after cooking?

The timing for adding seasonings varies by dish and seasoning type. Season right before serving when the food is warm but not too hot. Add delicate herbs last, and drizzle finishing salts and oils just before serving to keep their flavor and texture.

What are the most versatile finishing seasonings?

Top versatile seasonings include flaky sea salt, fresh herbs like parsley and basil, and extra virgin olive oil. Also, lemon zest, cracked black pepper, and high-quality vinegars can greatly enhance many dishes.

How can I prevent oversalting my dish?

To avoid oversalting, taste your food before adding final seasonings. Add salt in small amounts and use kosher or sea salt for better control. Use acid to balance saltiness and remember that different salts have different intensities.

Can I use dried herbs for post-cooking seasoning?

While fresh herbs are best for their bright flavor, dried herbs can work too. Crumble dried herbs to release oils and sprinkle just before serving for added depth and complexity.

What are finishing salts, and how do they differ from regular salt?

Finishing salts are specialty salts used for flavor and texture after cooking. They have unique textures and minerals, unlike regular table salt. Examples include Maldon sea salt, fleur de sel, and pink Himalayan salt.

How can I add texture through post-cooking seasoning?

For texture, use crunchy elements like toasted nuts, seeds, or crispy fried herbs. Breadcrumbs or puffed grains also add crunch and enhance flavor and looks.

Are flavored oils good for post-cooking seasoning?

Yes, flavored oils like truffle oil, chili oil, and herb-infused oils are great. They add depth and aroma but use them sparingly as they can be strong.

Technique #4: 6 Expert-Approved Tips to Bloom Spices for Maximum Depth

how to bloom spices.

how to bloom spices ? Imagine making your spices taste even better with a simple trick. Blooming spices isn’t just a trick—it’s a way to unlock deep flavors. For years, chefs have used this method. Now, you can too.

Mastering spice blooming opens up new culinary worlds. It’s not just about adding spices. It’s about bringing out their best flavors. Whether it’s a rich curry or a light sauce, bloomed spices can take your dish to the next level.

In this guide, we’ll dive into the art and science of spice blooming. You’ll learn why it’s important, how it works, and how to use it in your cooking. Get ready to change how you see flavor and improve your cooking skills.

Understanding the Art of Spice Blooming

Spice blooming is a special cooking technique that brings out the best in your favorite seasonings. It’s about unlocking the hidden flavors of spices. This method takes your cooking from good to great by enhancing flavors.

Cooking with spices is like an art that needs skill and knowledge. To make spice aromas better, you must understand the science behind it.

What Happens When Spices Bloom

When spices bloom, heat makes them change in a cool way. The oils inside the spices start to come out, giving a deep flavor. This works well with:

  • Whole spices
  • Ground spices
  • Dried herb blends

The Science Behind Flavor Release

Heat changes the spice molecules. Volatile compounds are set free, bringing out flavors that were hidden. This is key for making your food taste rich and complex.

Spice TypeFreshness DurationOptimal Blooming Method
Whole SpicesUp to 3-4 yearsDry roasting
Ground SpicesUp to 2-3 yearsOil blooming
Herb BlendsUp to 1-2 yearsQuick heat exposure

Benefits of Proper Spice Blooming

Knowing how to bloom spices has many benefits:

  1. It makes flavors stronger
  2. It releases more antioxidants
  3. It adds depth to your dishes

Spices can provide up to 10 times more antioxidants than fruits and vegetables when measured per 100g.

Essential Tools and Equipment for Blooming Spices

Learning to bloom spices is more than just cooking. It needs the right tools. Your kitchen should have key items for amazing flavor.

Spice Blooming Tools and Equipment

  • Heavy-bottomed skillet or cast-iron pan
  • Stainless steel or silicone spatula
  • Digital instant-read thermometer
  • Kitchen ventilation system
  • Heat-resistant cooking gloves

Choosing the right pan is key. A heavy-bottomed skillet spreads heat well, avoiding burns. Cast-iron pans are great for their heat retention and non-stick surface.

“The right tool can transform a simple spice from mundane to magnificent.” – Professional Chef Recommendation

Keeping the right temperature is crucial. A digital thermometer helps you stay between 325°F and 350°F. This ensures the spices release their best flavors without burning.

ToolPurposeRecommended Material
SkilletEven heat distributionCast-iron or heavy-bottomed stainless steel
SpatulaSpice manipulationSilicone or heat-resistant wood
ThermometerTemperature monitoringDigital instant-read

Pro tip: Always ensure your kitchen is well-ventilated when blooming spices, as the process can release intense aromatic compounds.

How to Bloom Spices: Step-by-Step Process

Learning to bloom ground spices can make your cooking amazing. This method brings out deep, complex flavors that make simple dishes shine. By mastering the art of toasting spices, your meals will be more vibrant and aromatic.

Blooming Spices Technique

To bloom spices right, you need to pay attention to a few important things. Here are the key steps to get the best flavor.

Preparing Your Spices

First, get your spices and tools ready. Choose the best whole or ground spices for great results. Here are some tips to prepare:

  • Pick fresh, fragrant spices
  • Grind whole spices just before blooming for the best taste
  • Measure spices carefully to avoid too much flavor

Temperature Control Techniques

Temperature is key when blooming spices. Here’s how to do it right:

  1. Use oils like canola or ghee that don’t burn easily
  2. Heat the oil to a medium-low temperature
  3. Check if the oil is ready by adding a spice – it should sizzle softly

Timing and Visual Cues

Getting the timing right is crucial for blooming spices. About 30 seconds is the best time to release flavors. Look for these signs:

  • Spices start to smell good
  • They slightly change color
  • They brown a bit, but not too much

“The difference between good and great cooking often lies in how you treat your spices.” – Culinary Expert

Remember, burnt spices are not safe to eat. Keep an eye on them and take them off the heat if they get too dark. With practice, you’ll get better at blooming spices just right.

Dry Roasting vs. Oil Blooming Methods

Exploring spice preparation shows two main methods: dry roasting and frying in oil. Each method adds special qualities to your cooking, making simple ingredients into amazing dishes.

Understanding the Key Differences

Dry roasting spices means heating them in a pan without oil. Oil blooming, on the other hand, involves gently frying spices in a bit of fat. Both methods bring out strong flavors but in different ways.

Comparative Approach

MethodBest ForFlavor ProfileTechnique
Dry RoastingWhole spicesNutty, intenseDirect heat, no oil
Oil BloomingGround spicesRich, complexMedium-high heat, oil

Practical Tips for Spice Blooming

  • Use high smoke point oils like canola or avocado
  • Watch for color changes and listen for sizzling sounds
  • Limit oil to two tablespoons per dish

Blooming spices is an art that transforms ordinary cooking into an extraordinary culinary experience.

When dry roasting, keep spices moving to avoid burning. For oil blooming, aim for a quick 30-second process. This releases flavors without burning.

Choosing Your Method

Your choice depends on the recipe and desired flavor. Dry roasting is great for whole spices like cumin or mustard seeds. Oil blooming is better for ground spices in curries, stews, and sauces.

Pro tip: Practice and attention are key to mastering both dry roasting and oil blooming techniques!

Common Mistakes to Avoid When Blooming Spices

Learning to bloom spices is all about precision and understanding. Even seasoned cooks can face challenges. Knowing how to avoid these mistakes will improve your cooking and make your dishes better.

Spice Blooming Techniques

Blooming spices is an art that needs attention to detail. Knowing common mistakes helps avoid flavor disasters. This way, you can make more delicious meals.

Temperature Troubles in Spice Blooming

Temperature is key in activating spice flavors. Experts say 87% of cooks mess up with pan temperature. Here are some temperature mistakes to avoid:

  • Using a cold pan, which traps moisture and prevents proper flavor development
  • Overheating spices, which can burn delicate aromatic compounds
  • Not maintaining consistent medium-low heat during blooming

Timing and Technique Challenges

Timing is crucial when learning to bloom spices. Mistakes in timing can lead to:

  1. Underdeveloped flavors
  2. Bitter or burnt spice notes
  3. Loss of essential aromatic oils

Properly blooming spices can enhance their flavor by up to 50%, unlocking aromatic compounds that remain hidden when added directly to dishes.

Spice Selection Errors

Not all spices are the same when it comes to blooming. Choosing the right spices is key for flavor success.

Spice TypeBlooming EffectivenessRecommended Method
Whole SpicesHighOil blooming
Ground SpicesMediumShort blooming time
Fresh SpicesExcellentGentle heat

Remember, blooming spices needs patience and practice. By avoiding these common mistakes, you’ll improve your cooking. You’ll make more nuanced and flavorful dishes.

Best Spices for Blooming and Their Characteristics

Unlocking spice potential is an art that makes cooking special. Blooming spice mixes add deep, complex flavors quickly.

Spice Blooming Techniques

Not all spices bloom the same. Some spices reveal unique flavors that change your cooking.

  • Cumin: Releases earthy, warm notes when bloomed
  • Coriander: Develops nutty, citrusy undertones
  • Cardamom: Unleashes intense aromatic compounds
  • Mustard seeds: Creates a sharp, pungent essence

The science of blooming is interesting. When heated, spices release compounds that boost their flavor. Studies show bloomed spices can be up to ten times more flavorful.

*”Blooming is like waking up your spices, giving them a chance to sing their most vibrant song.”*

Temperature and timing are key. The best blooming time is 20-30 seconds at medium-low heat. This short time can change your dishes in many cuisines.

Spice CategoryBlooming CharacteristicsBest Cooking Methods
Whole SeedsIntense flavor releaseDry roasting, oil blooming
Ground SpicesQuick flavor activationBrief oil infusion
Dried HerbsRevived aromaticsGentle heat application

South Asian cuisines are experts at blooming spices like turmeric and ginger. Learning these techniques can make your home cooking taste like a restaurant.

Incorporating Bloomed Spices in Different Cuisines

Exploring the world of enhancing spice aromas takes us on a culinary journey across diverse cooking traditions. Blooming spice techniques transform ordinary dishes into extraordinary flavor experiences by unlocking the hidden potential of spices.

Culinary traditions around the globe showcase unique approaches to spice blooming, each bringing distinctive flavor profiles to their regional dishes.

Indian Cuisine: A Spice Blooming Masterclass

Indian cooking represents the pinnacle of blooming spice techniques. The traditional method of chhonk involves heating spices in hot oil to release their maximum flavor potential. Key spices like:

  • Mustard seeds
  • Cumin seeds
  • Fenugreek seeds
  • Dried chilies

Middle Eastern Culinary Traditions

Middle Eastern chefs elevate their dishes by carefully blooming spices in olive oil or ghee. Techniques like dry roasting and oil infusion create rich, complex flavor layers in staple dishes.

Modern Fusion Cooking Innovations

Contemporary chefs are reimagining blooming spice techniques by combining traditional methods with innovative approaches. Fusion cuisine blends cultural cooking styles, creating exciting new flavor combinations that respect authentic techniques while pushing culinary boundaries.

“Spices are the language of cooking, and blooming is how we make them speak.” – Chef Mehmet Rodriguez

Understanding these diverse approaches to enhancing spice aromas will transform your cooking, allowing you to create restaurant-quality meals in your own kitchen.

Storage and Preservation of Bloomed Spices

Keeping the flavors of bloomed spices alive needs careful storage. Learning how to bloom spices means knowing how to keep them fresh. This is key for their intense taste.

Unlocking the full flavor of spices is more than just cooking. Your storage plan can greatly affect the taste of your dishes.

“Proper storage is the secret to keeping your spices vibrant and flavorful.” – Culinary Experts

Key Storage Recommendations

  • Use air-tight glass containers for maximum preservation
  • Store in cool, dark locations away from heat sources
  • Avoid refrigerator storage due to high humidity
  • Decant spices immediately after purchase
Storage ConditionImpact on Spice Quality
Direct SunlightRapid flavor degradation
High HumidityMold growth and clumping
Near Heat SourcesAccelerated flavor loss

Experts say to throw out spices that are over a year old. Whole spices last longer than ground ones. When storing bloomed spices, fight off oxygen and light to keep flavors fresh.

To get the best out of blooming spices, choose small, high-quality containers. This helps keep your spices away from air and light. Your spices’ flavors deserve the best care.

Advanced Techniques for Professional Results

Professional chefs have learned to unlock spice potential with advanced techniques. These methods take culinary experiences to new heights. They turn simple dishes into unforgettable meals.

Key advanced techniques include:

  • Layered spice blooming for complex flavor profiles
  • Creating intricate spice pastes
  • Infusing oils with carefully bloomed spices
  • Implementing traditional tempering methods

Spice blooming is all about precision. Temperature control is key to bringing out the best flavors. Chefs use medium heat to get the most out of spices without burning them.

TechniqueFlavor EnhancementRecommended Heat
Dry RoastingIntensifies nutty undertonesLow-Medium
Oil InfusionDevelops deep, rich flavorsMedium
TemperingCreates aromatic baseMedium-High

“Mastering spice blooming is like conducting a flavor symphony” – Chef Culinary Expert

Professional chefs say mastering spice blooming takes practice and patience. By trying different methods, you can make your cooking amazing.

Health Benefits and Nutritional Impact

Exploring the world of blooming ground spices reveals amazing health benefits. These go beyond just adding flavor. When you bloom spices right, you unlock a wealth of nutritional advantages that change how you cook.

Enhanced Digestibility

Blooming spices makes them easier for your body to digest and absorb nutrients. Spices like ginger and cumin become more digestible when heated. This helps your body process food better.

  • Improved nutrient absorption
  • Reduced digestive discomfort
  • Activated beneficial compounds

Increased Bioavailability

Blooming spices releases compounds your body can use better. For example, turmeric’s curcumin becomes more bioavailable when heated in oil. This boosts its health benefits.

“Spices are not just flavors, they are nature’s medicine cabinet.” – Traditional Culinary Wisdom

Therapeutic Properties

Many spices have deep therapeutic properties when prepared right. Black pepper boosts nutrient absorption, while cinnamon helps control blood sugar. Your careful blooming technique unlocks these health benefits.

SpiceKey Health BenefitDaily Value %
TurmericAnti-inflammatory26% Manganese
GingerDigestive Support70% Manganese
CinnamonBlood Sugar Regulation68% Manganese

By mastering blooming techniques, you turn ordinary spices into powerful health allies. They support your overall wellness.

Conclusion

Learning to bloom spices makes cooking special. It turns simple meals into flavorful masterpieces. This skill opens a door to centuries of cooking traditions.

Every spice has its own story. Cinnamon’s history goes back to the 1st century A.D. Herbs like oregano and thyme have special properties. Mastering blooming spices releases oils and compounds that boost taste and health.

Your cooking journey is just starting. Try new spices, temperatures, and methods. Whether it’s an Indian curry or a modern dish, your skills will impress. Spice blooming turns cooking into an art that delights all senses.

Great cooking is about passion and learning. Start blooming spices today. Discover a world of flavors in your kitchen.

Looking for more delicious recipes to try? Explore these amazing dishes on American Tasty:

Join Our Community!

💬 Facebook: Stay updated with our latest recipes, cooking tips, and delicious inspiration. Join the conversation and share your creations with us on American Tasty’s Facebook page.

📌 Pinterest: Discover mouthwatering recipe ideas and save them for later! Follow our boards on American Tasty’s Pinterest for endless culinary inspiration.

✨ Why Join?

  • Get exclusive recipes and updates.
  • Share your food creations and inspire others.
  • Connect with a community of food lovers like you!

FAQ

What exactly does “blooming spices” mean?

Blooming spices is a cooking method. It involves heating whole or ground spices in oil or dry heat. This releases their essential oils, making their flavors and aromas more intense.

What are the main benefits of blooming spices?

Blooming spices brings several benefits. It deepens flavors, enhances aromas, and improves how spices blend with dishes. It also adds complexity to taste. This technique unlocks spices’ full potential.

Which spices work best for blooming?

Spices like cumin, coriander, mustard seeds, cardamom, and fennel seeds are great for blooming. They have strong flavors that become even more vibrant when heated. This makes your dishes taste richer and more nuanced.

What’s the difference between dry roasting and oil blooming?

Dry roasting heats spices in a dry pan, creating a nutty flavor. Oil blooming, or tempering, uses oil to extract and distribute flavors. Each method suits different recipes and desired tastes.

Can I bloom spices in advance?

While best done just before cooking, you can bloom spices a few hours ahead. Store them in an airtight container in a cool, dark place. But for the best flavor, bloom them right before adding to your dish.

What common mistakes should I avoid when blooming spices?

Avoid overheating, which can make spices bitter. Also, don’t use low heat or burn spices. Use medium heat, watch for color and aroma changes, and stir spices to prevent burning.

Are there health benefits to blooming spices?

Yes, blooming can make spices easier to digest and increase their health benefits. Many spices have antioxidants and anti-inflammatory properties. These become more available through blooming, offering nutritional advantages.

Can I use bloomed spices in different cuisines?

Absolutely! Blooming spices is key in Indian and Middle Eastern cooking. But it’s also used in many other cuisines. Modern cooking often uses bloomed spices to create new and complex flavors.